
Step 1 - Setting Up Your Environment
Step 4 - ChatGPT Writes the App
Introduction
Building your own mobile app might seem like a daunting task, especially if you’re not a tech-savvy person. However, with tools like Flutter and the guidance of AI-powered assistants like ChatGPT, it’s more accessible than ever. This beginner-friendly guide will take you through the steps of creating a basic Flutter app with the help of ChatGPT, even if you have little to no technical background.
What is Flutter?
Flutter, Google’s revolutionary open-source UI toolkit, empowers developers to craft aesthetically pleasing apps for a multitude of platforms, including iOS, Android, web, and desktop - all from a unified codebase. Embrace Flutter’s efficiency to streamline your development process, and join a rapidly growing community relying on Flutter’s robust, scalable solutions for business and personal projects.
Flutter Basics - Dart Language
Flutter’s heart is the Dart programming language, known for its simplicity and familiarity with Java and C# developers. However, don’t worry if you’re new to Dart; ChatGPT’s capabilities ensure that even novices can jump into building their first app with ease.
Flutter Basics - Widgets
Widgets are the cornerstone of your app’s interface in Flutter. These versatile components form a hierarchy, shaping everything you see on the screen. Delve into the world of widgets and understand how they orchestrate the look and feel of your app here.
What is ChatGPT?
ChatGPT by OpenAI is a cutting-edge AI-powered assistant that revolutionizes coding and problem-solving. It’s more than just a chatbot. It’s a dynamic tool that guides you through Flutter, troubleshoots, and crafts code snippets. It will make your app development journey smoother.
Prerequisites
- Flutter is versatile. Install it locally or experiment with Dartpad for browser-based development.
- Access ChatGPT’s full potential with an account, or start with the free version for basic support.
Step 1 - Setting Up Your Environment
Before you build an app, you either need to set up the Flutter development environment on your computer, or you can use Dartpad, which allows you to create a Flutter app in the browser directly. Dartpad might be easier if you’ve never installed a development environment before. If you use Dartpad, you can skip the installation step.
Installing Flutter
Visit the official Flutter website and follow the instructions to download and install Flutter on your system.
Installing an Editor (IDE)
You’ll need an IDE (Integrated Development Environment) like Android Studio or Visual Studio Code. Both are user-friendly and offer great support for Flutter development. You can follow the instructions here, which are also on the official Flutter website.
Step 2 - Create the Project
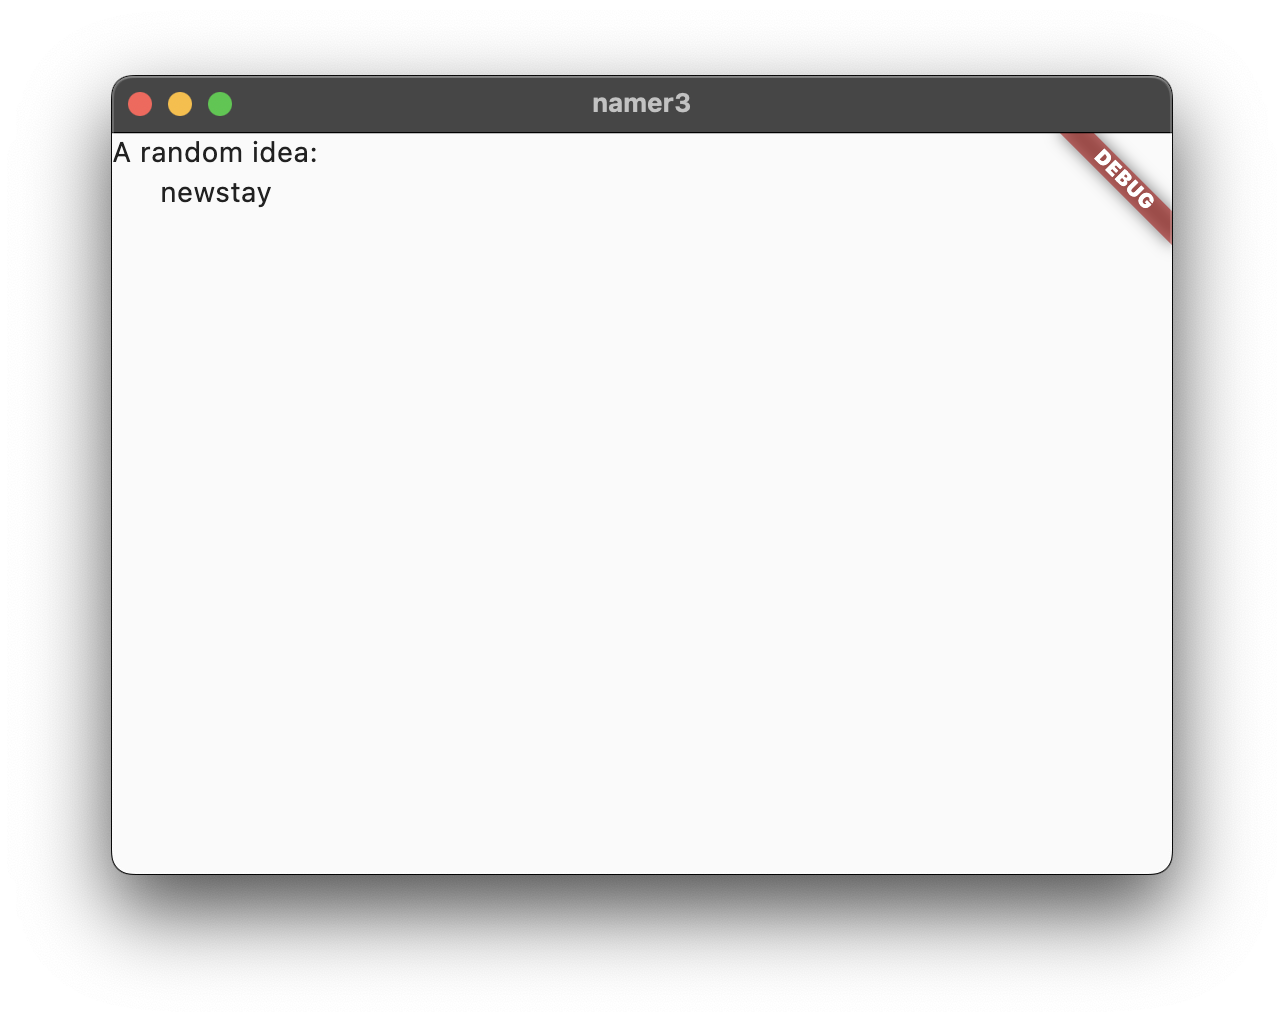
Follow the instructions in this codelab to create your first Flutter project. You don’t need to follow the tutorial all the way through. You can just step through until you have a running app, which is an early step in this tutorial. When you press play, the app should eventually start and look like this:
Step 3 - Design Your App
The easiest way to get started is to draw your app as a wireframe with a tool like Figma or Draw.io. Figma is a full-fledged design tool, and it’s great because developers understand how to use it. However, Draw IO is free to use and allows you to build wireframes quickly. This is what it looks like. I created this with a wireframe template.

You could even draw the image by hand with a tablet or scan it. ChatGPT will understand the general gist.
Step 4 - ChatGPT Writes the App
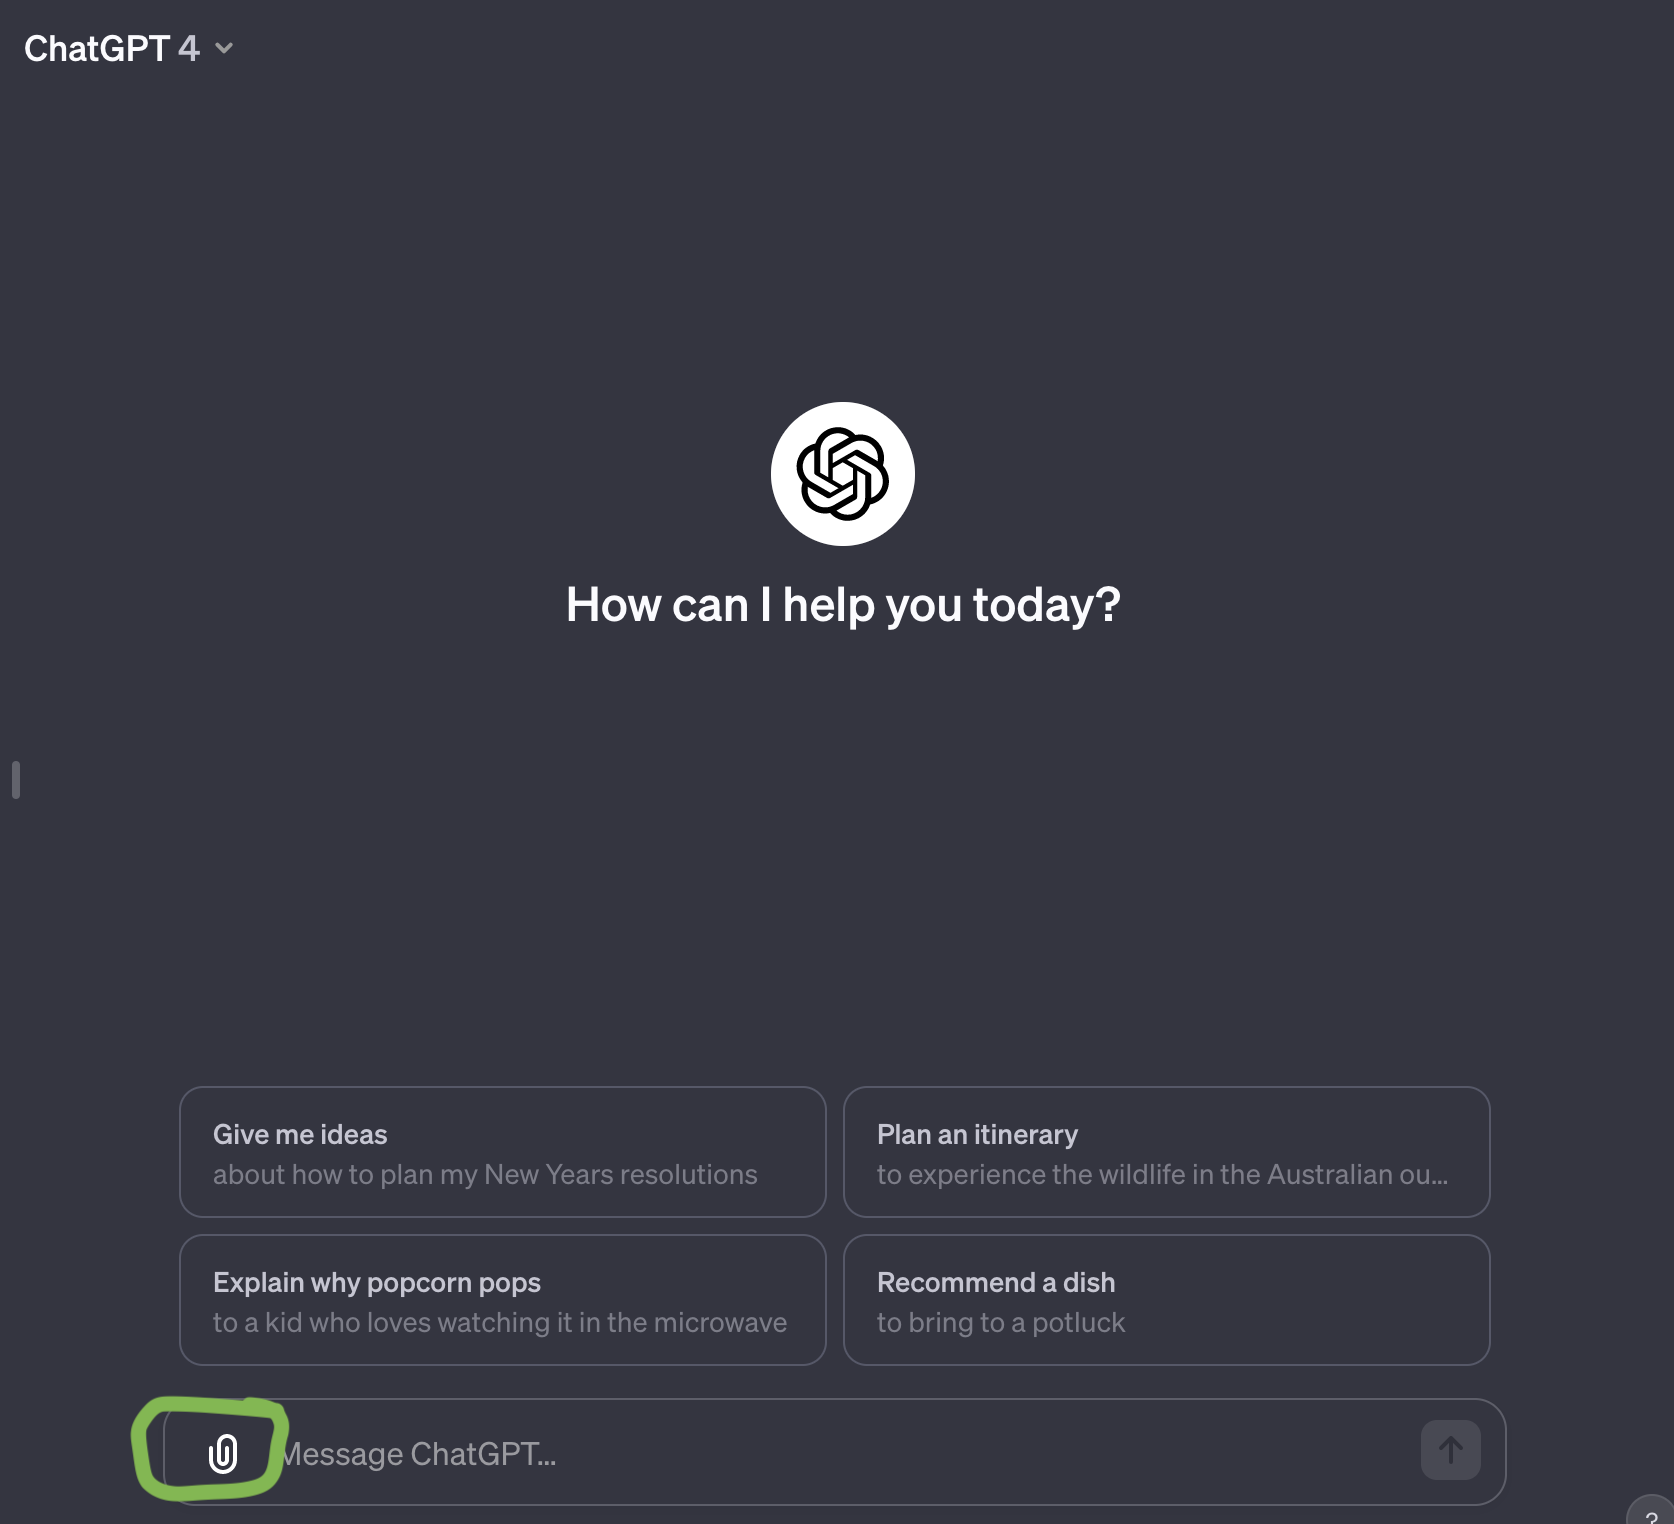
Choose ChatGPT 4 if you have the full version of ChatGPT, and click the button here to feed ChatGPT your design. If you don’t have the paid version of ChatGPT, you may need to explain the design in words.
The next important step is prompting ChatGPT. This is the secret sauce. Practicing your prompt engineering is the real key to getting the most from ChatGPT. My app Context Note helps you take control of prompting ChatGPT and helps you to build apps with a better user interface than the standard ChatGPT screen.

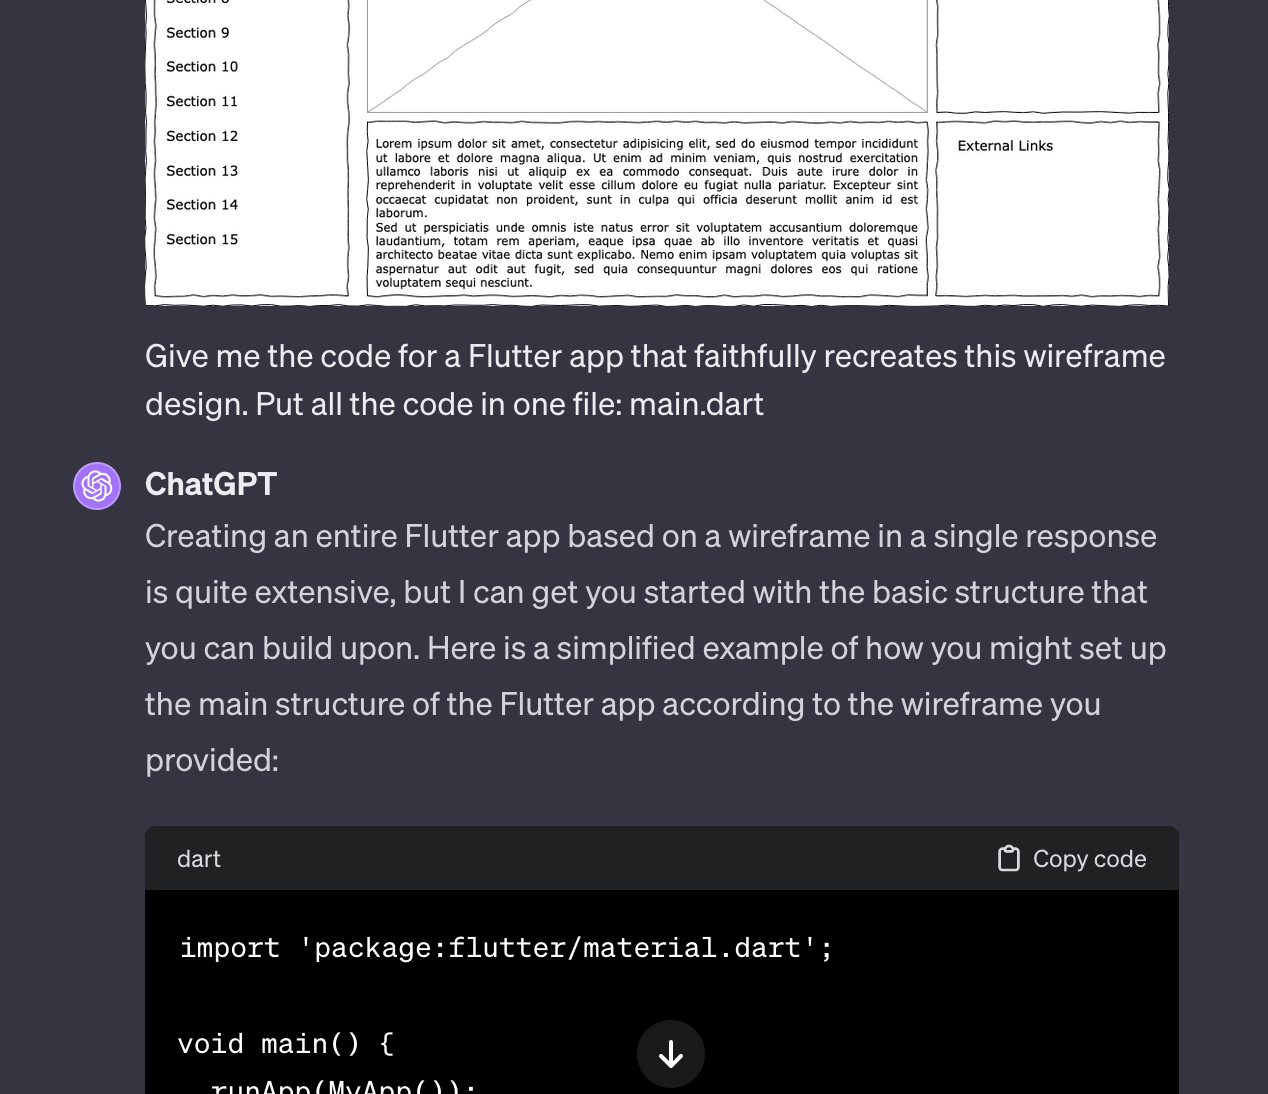
ChatGPT will think about your request and output something like this.
It should give you some Flutter code, and it will look something like this:
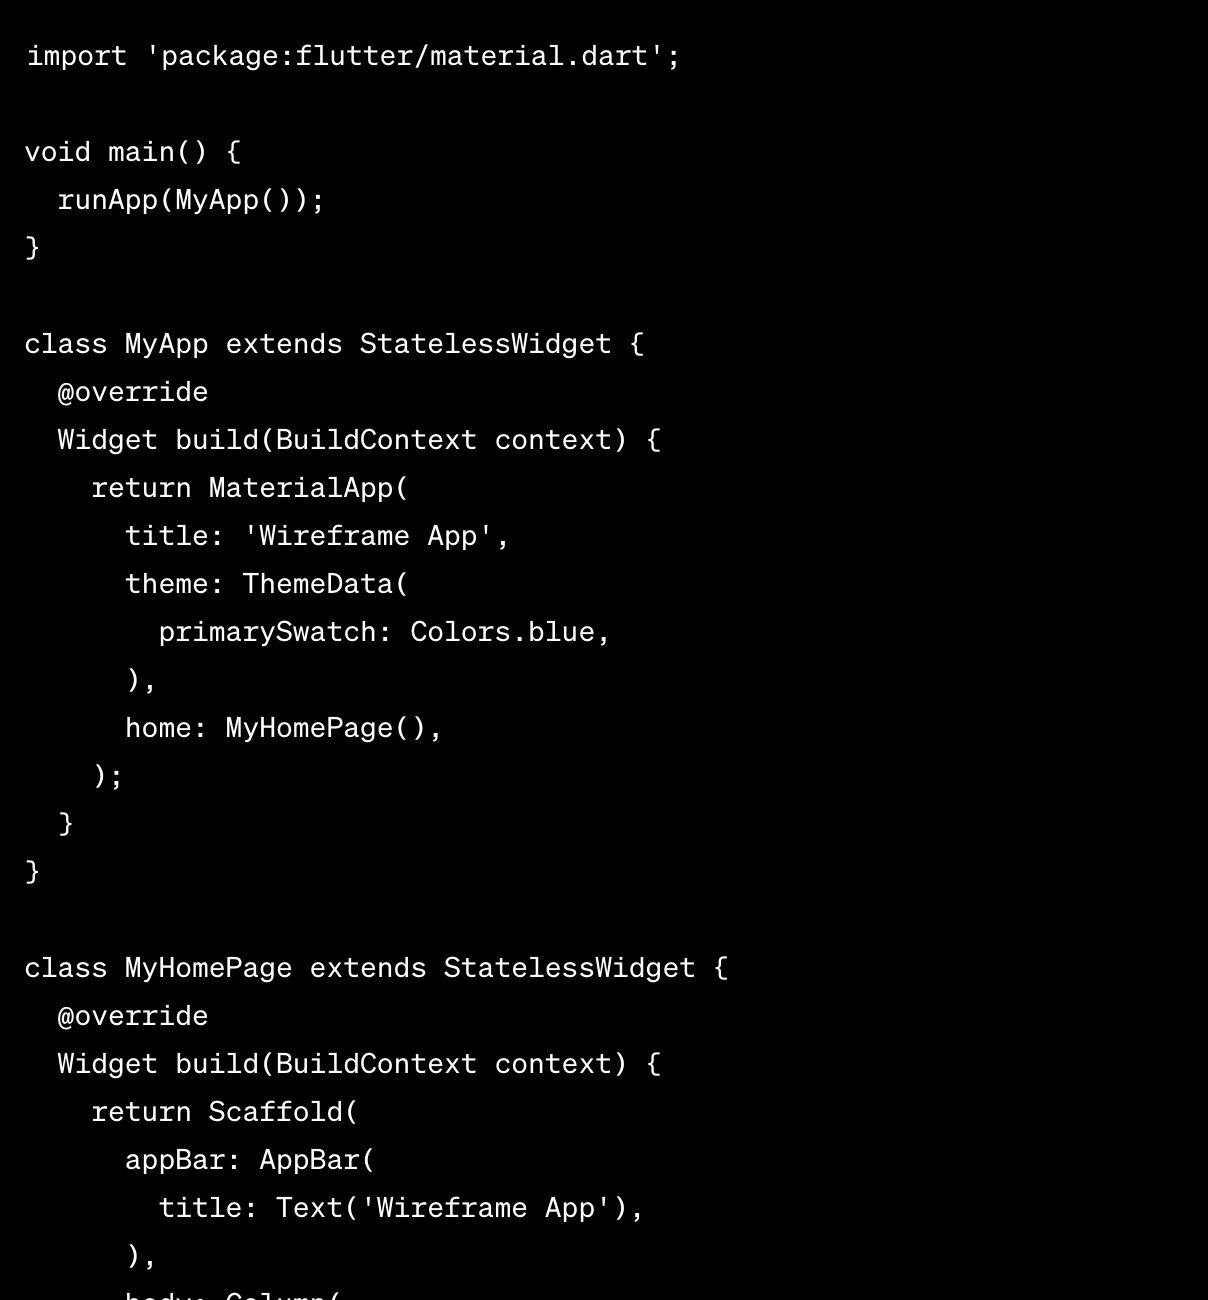
Copy the code and paste it over the top of the code in main.dart from step 2. You can paste it into Dartpad if you didn’t install an IDE.
If you’re using Visual Studio code as your IDE, it will look something like this:

Step 5 - Run The App
Hopefully, ChatGPT gave you a working sample. It doesn’t always get this right the first time, but in my case, it did. You shouldn’t see any red squiggly lines. If you see red squiggly lines, you may need more help from ChatGPT. Otherwise, run the app in the same way you ran it in step 2.
This is what ChatGPT produced the first time around for me.
Very impressive, right? 😲
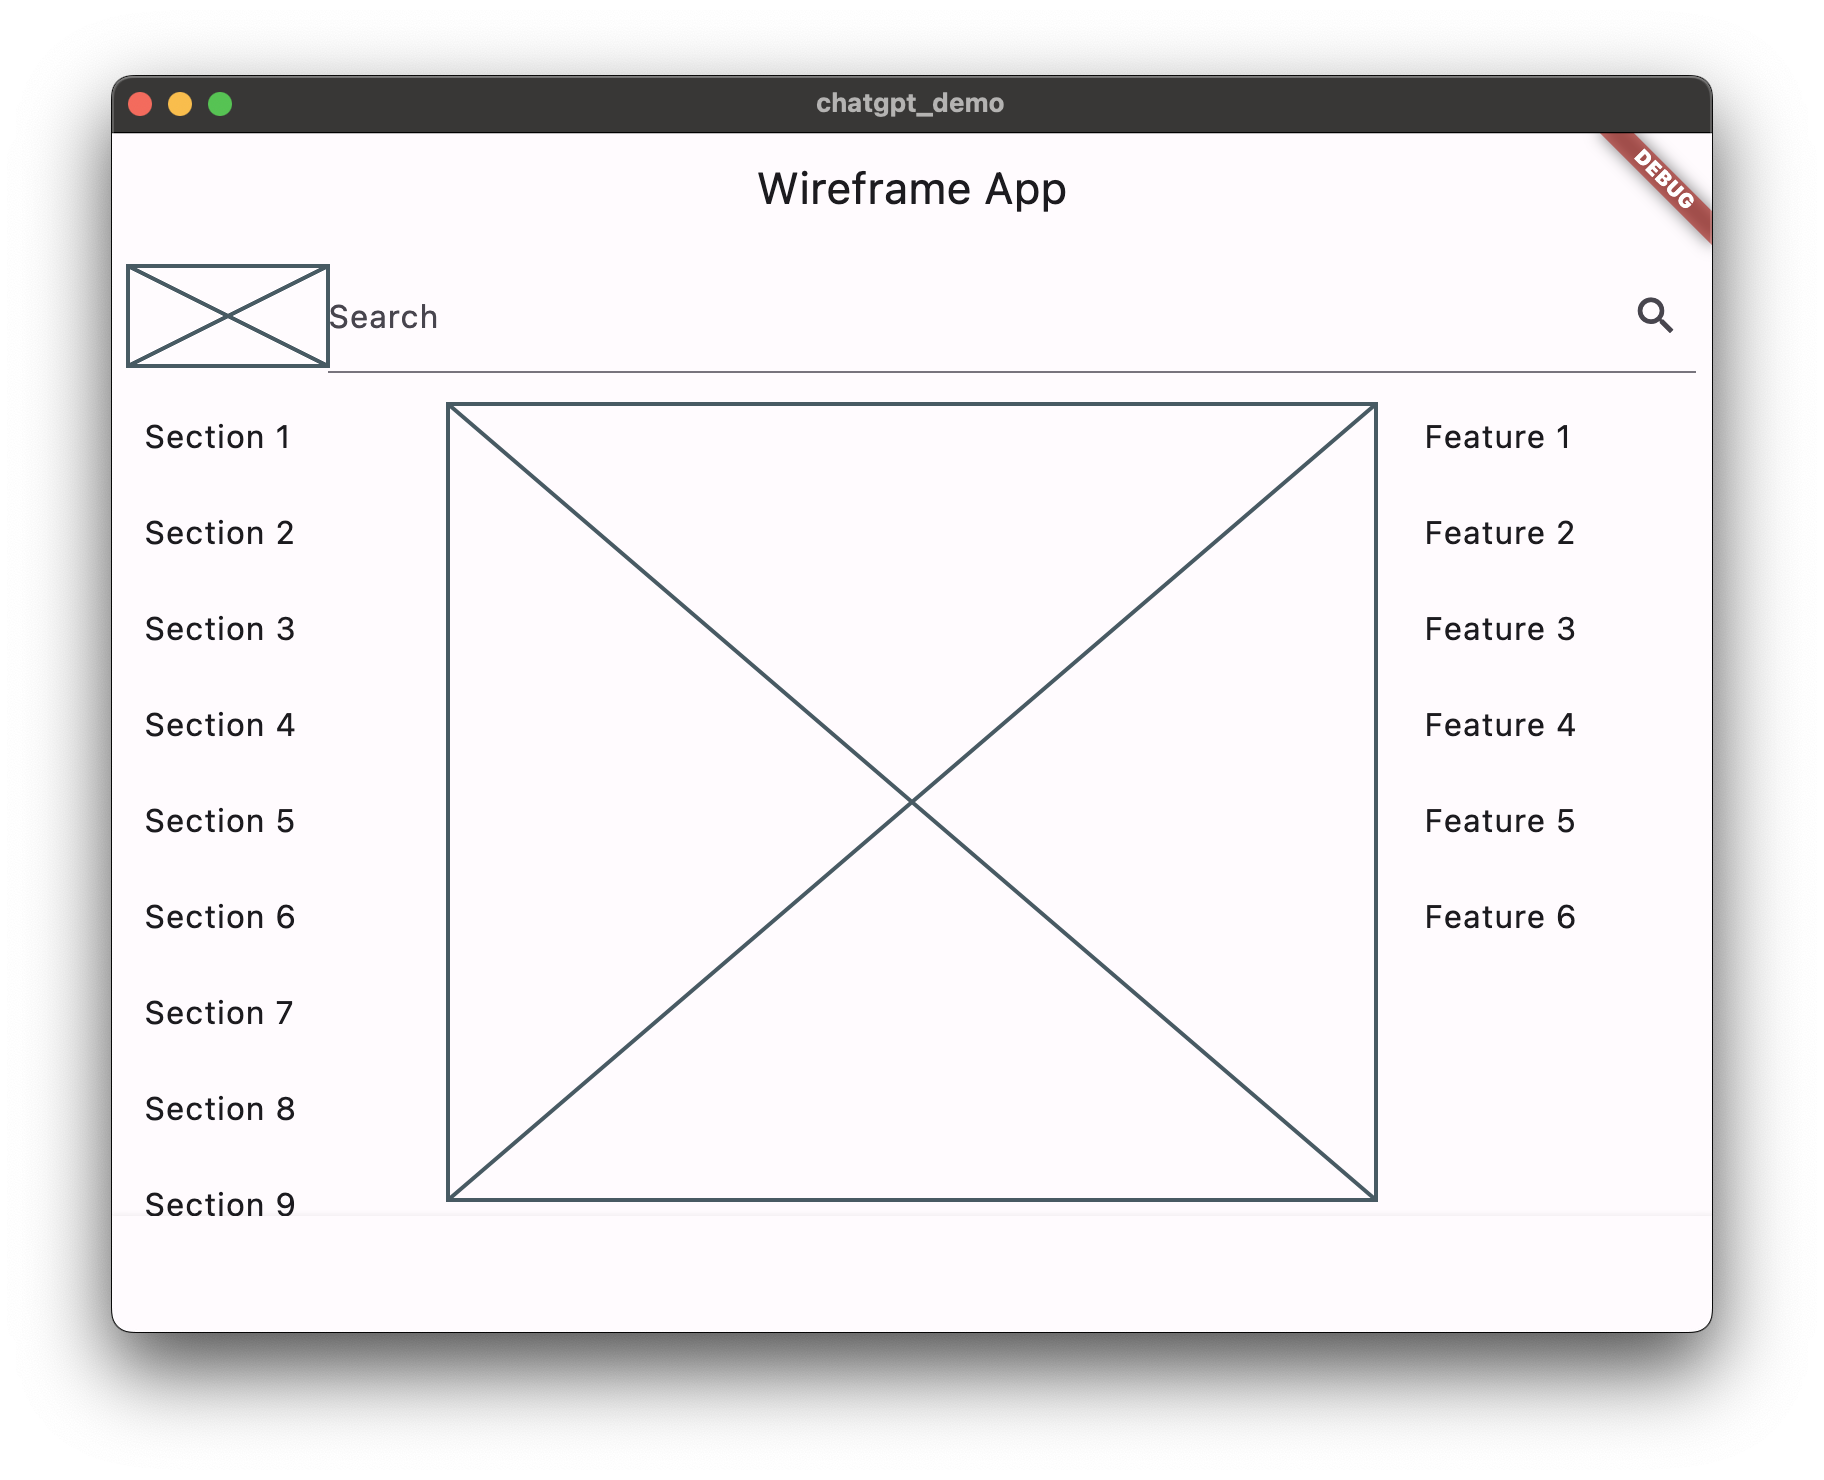
You’re going to notice that it wasn’t perfect the first time around, but it’s a great start. Building a full app requires several iterations.
This is how the app looks on Android.

Step 6 - Further Prompting
Take a screenshot of the Flutter app that ChatGPT produced and feed it back to ChatGPT. Give it a prompt with instructions on what to do next. Again, prompting (and context) is the key to getting the most out of ChatGPT.
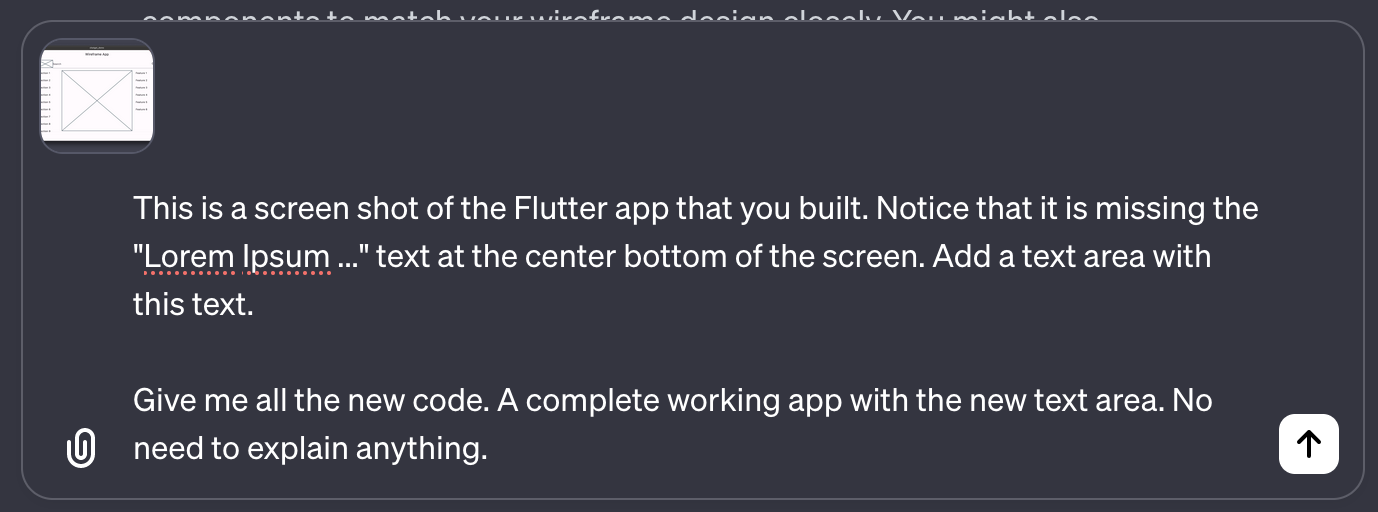
ChatGPT can sometimes be unpredictable. It sometimes gets too verbose and tries to explain too much, or it doesn’t give you all the code. In my case, it gave me a completely new version of the code.
Copy ChatGPT’s new code and paste it over the top of main.dart, then reload the app or run it again.
This was the result in my case. Notice that not only did ChatGPT add the text, but it also fixed up the search bar, although it removed the logo placeholder.
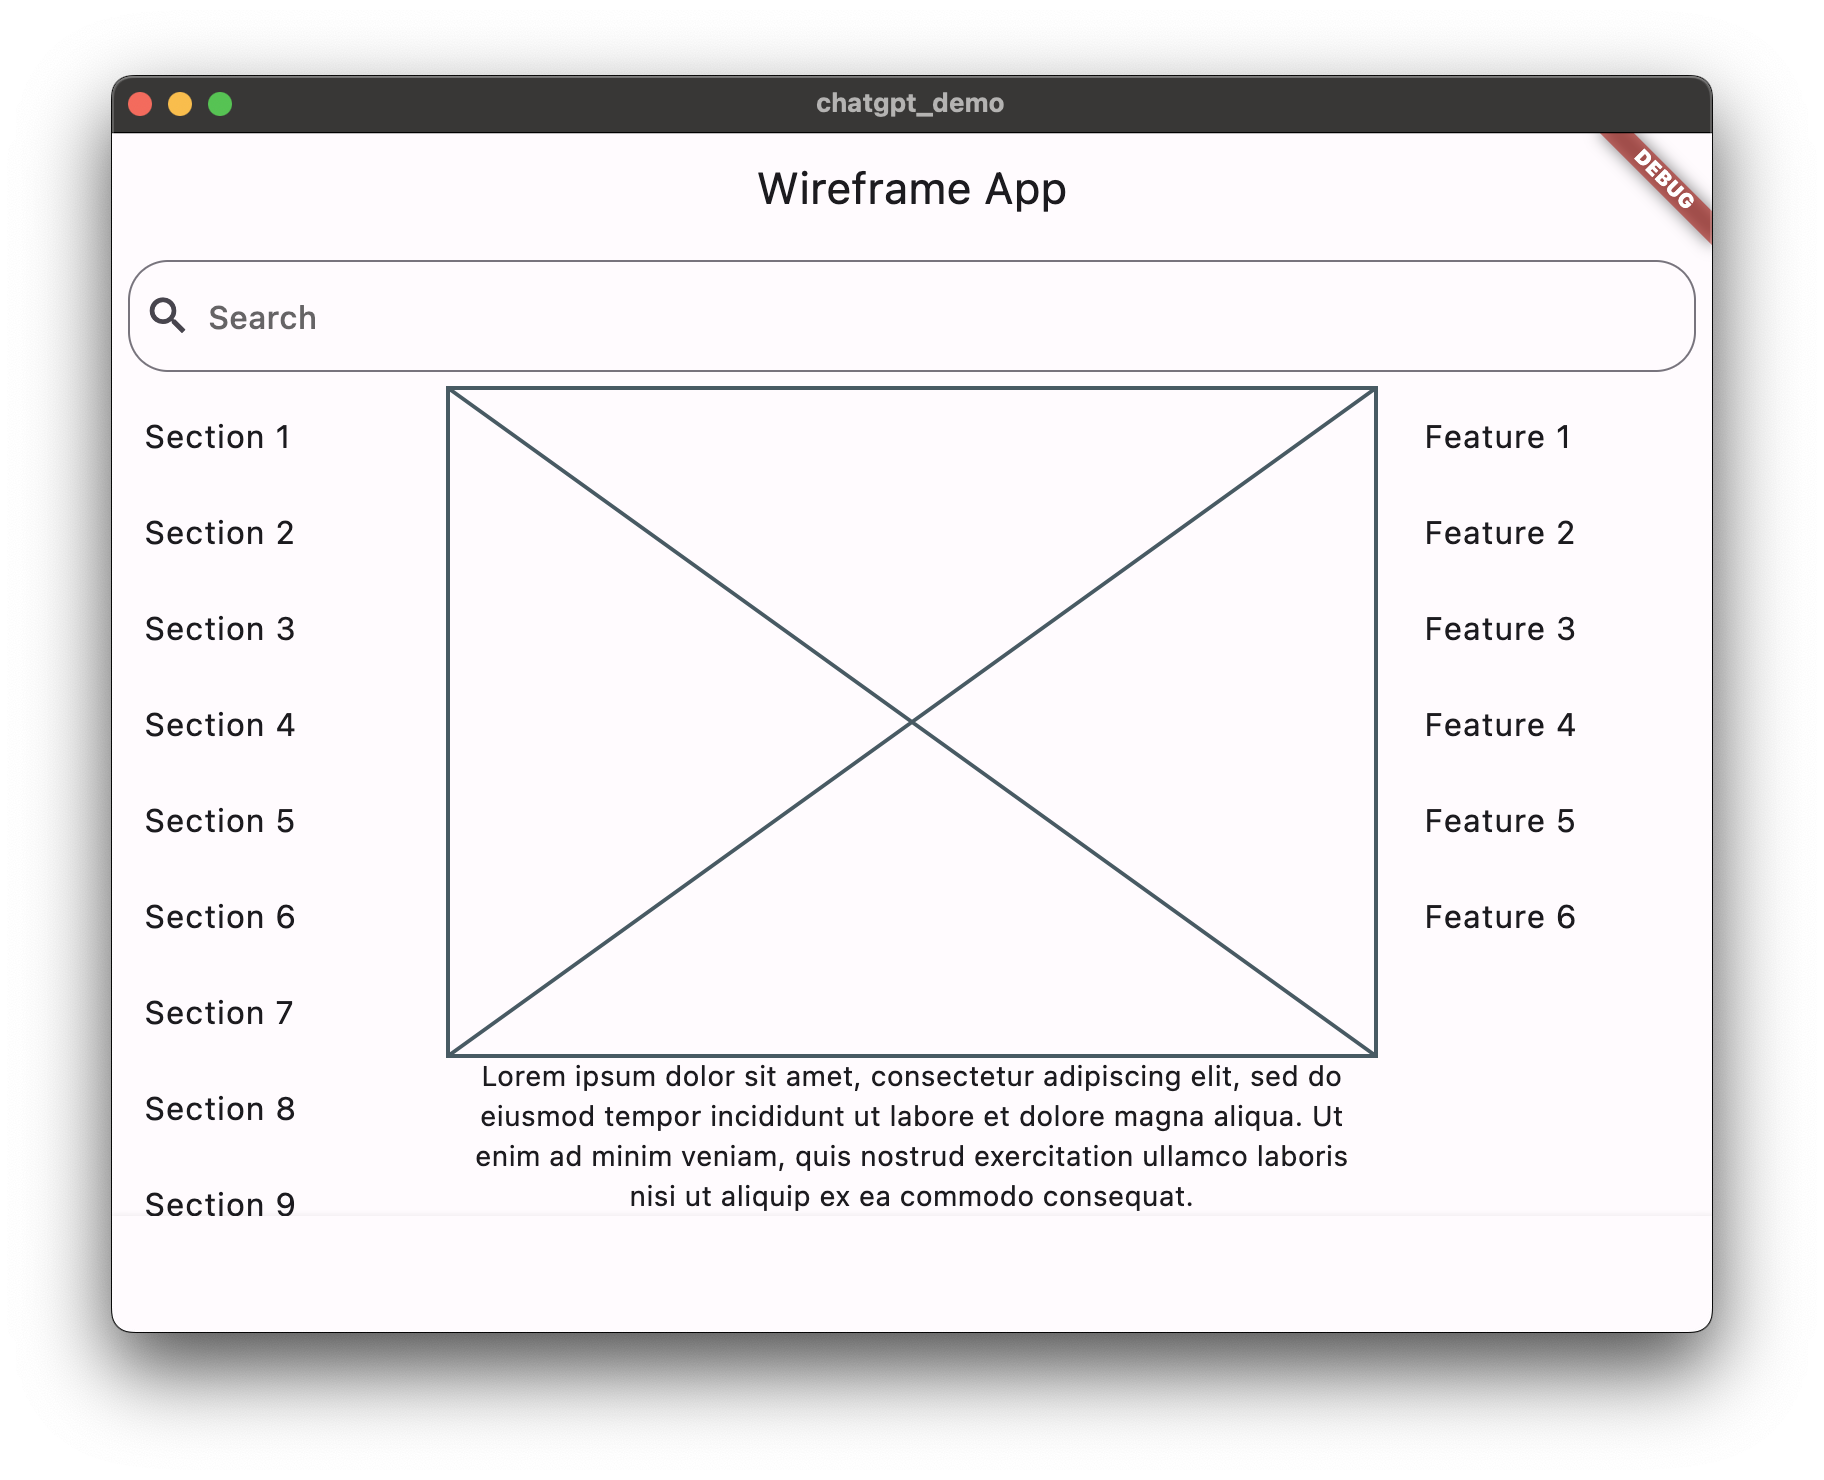
Working with ChatGPT is an iterative process. You have to go through this prompting process again and again. As you learn more about Dart and Flutter, you will get better at this, and you’ll be able to get ChatGPT to modify small portions of the screen at a time.
Step 7 - Use Context Note
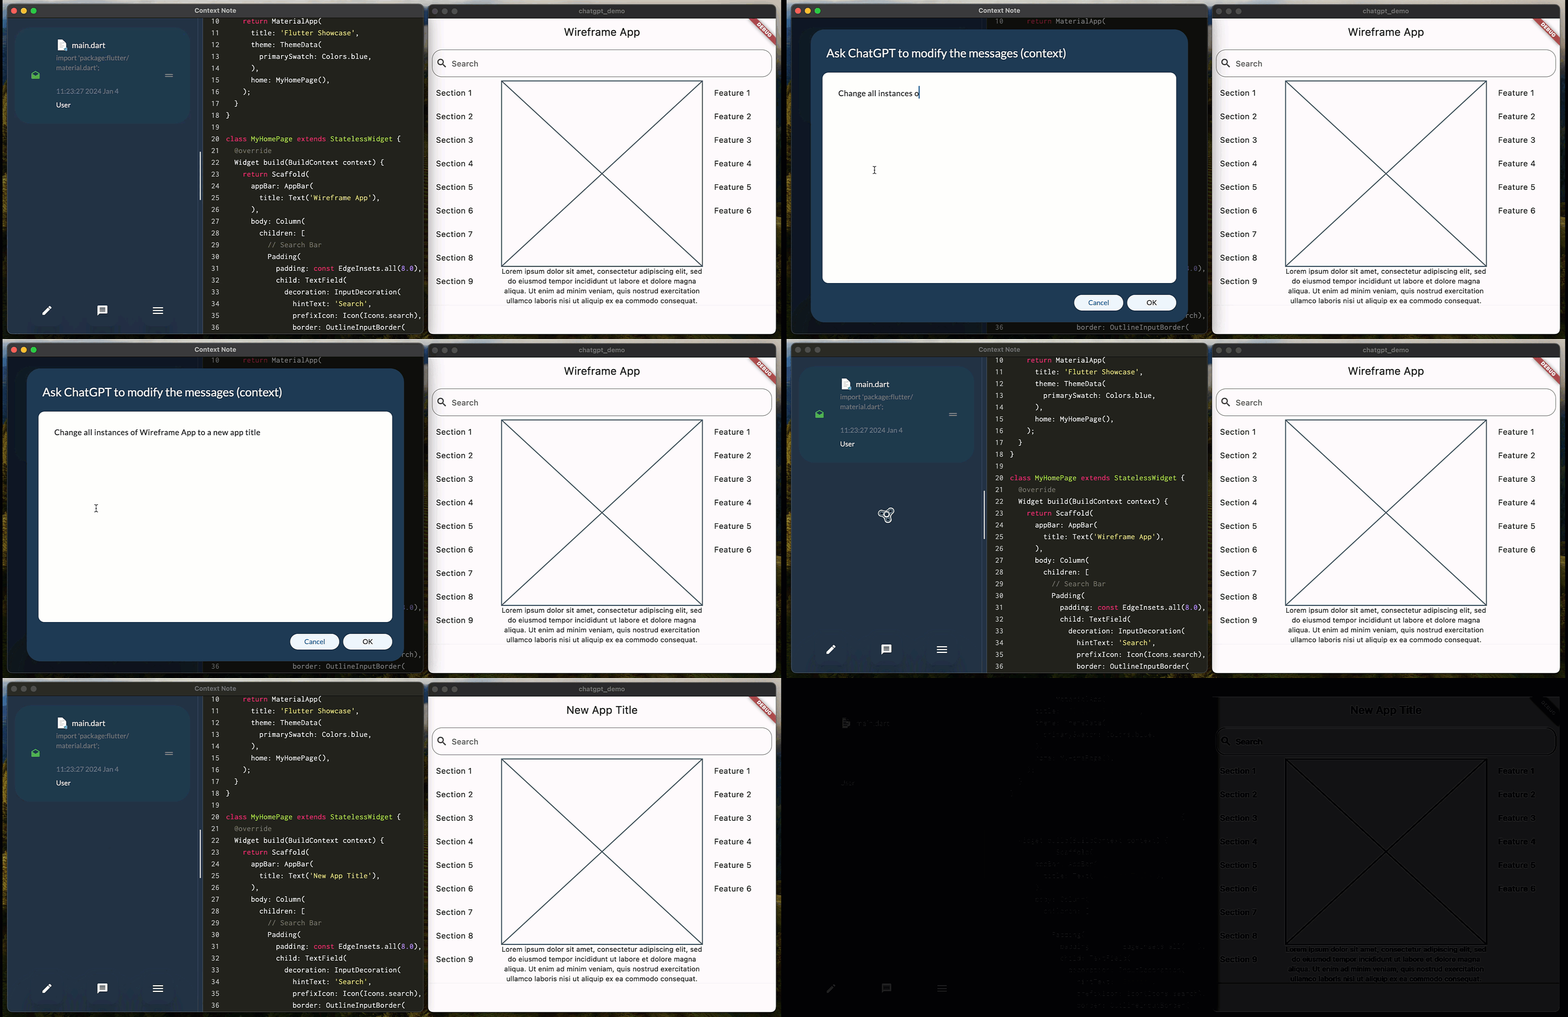
As you can see, copying and pasting code from the ChatGPT browser interface gets old quickly. More importantly, ChatGPT can’t see the latest version of your code without you pasting it into the chat. Context Note fixes this issue by exposing your code to ChatGPT.
You can feed larger codebases to ChatGPT, and ChatGPT can directly modify the code instead of doing all the copying and pasting.
Conclusion
Unleash the potential of Flutter with ChatGPT, a combination that simplifies app development for beginners. As your skills grow, tools like Context Note can further refine your experience. For those who feel limited by ChatGPT, I’m here to elevate your project. Discover the endless possibilities of app creation today!
FAQs
- Do I need programming experience to use Flutter?
No, basic concepts are straightforward, and resources like ChatGPT can help beginners.
- Is Flutter free to use?
Yes, Flutter is an open-source framework and is completely free.
- Are there better tools for building apps with ChatGPT?
Yes, I’m working on Context Note, which gives you much better control over the conversation and allows you to send all the Flutter code to ChatGPT. Reach out if you’d like to beta test the app and improve your ability to build Flutter apps with ChatGPT.
- Can ChatGPT write my entire app?
Yes, but it may require many iterations, and eventually, you will probably hit a point where you need an experienced Flutter developer to maintain the finished product.
Reach out to build an app here.
